If you are setting up a Windows machine for development, winget is a quick way to install the tools you need without downloading each installer manually. This guide installs Git, GitHub CLI, and Visual Studio Code from Command Prompt.
Before you start
Use Windows 10 version 1809 or later, or Windows 11, and open Command Prompt. You do not normally need to run it as Administrator, but Windows may ask for permission when an installer needs elevation.
If you are not sure where to find it, open the Windows search menu, type cmd, and select Command Prompt. All commands in this guide work there. You can also use PowerShell if you prefer.
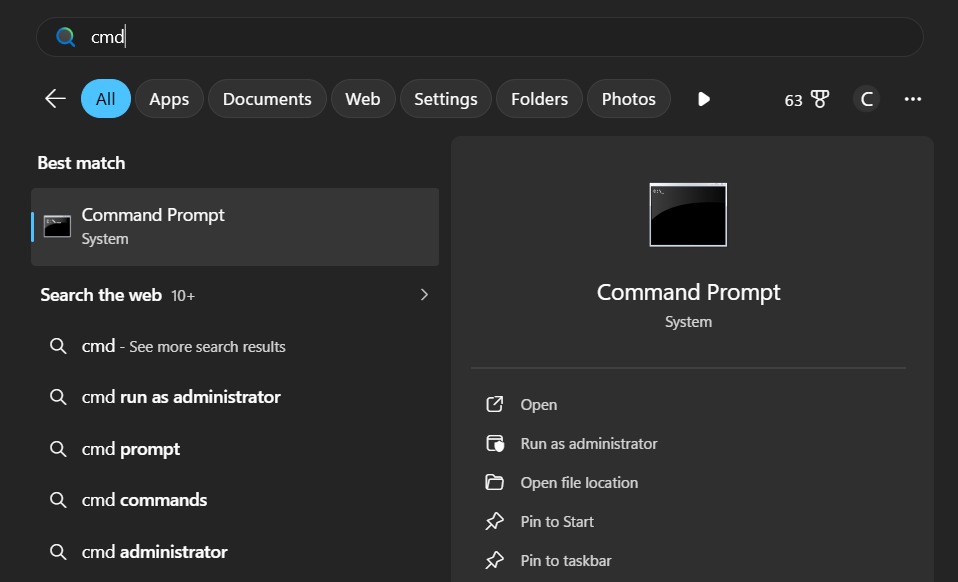
Check that winget is available:
winget --versionIf it prints a version number, you are ready to continue.
Install Git
Git tracks changes in your projects and is required by many development tools. Install it with:
winget install --id Git.GitClose and reopen Command Prompt after the installation, then verify it:
git --versionInstall GitHub CLI
GitHub CLI, or gh, lets you work with repositories, issues, pull requests, and GitHub Actions from the terminal:
winget install --id GitHub.cliVerify the installation:
gh --versionInstall Visual Studio Code
Visual Studio Code is a lightweight editor with an integrated terminal and extensions:
winget install --id Microsoft.VisualStudioCodeCheck that the command-line launcher is available:
code --versionOpen the current project from Command Prompt with:
code .Setup complete
Run these commands one at a time:
git --version
gh --version
code --version
If all three commands print version information, you are done. Git, GitHub CLI, and VS Code are installed and ready to use. If any command is not recognized or returns an error, check the troubleshooting steps below.
If something went wrong
winget is not recognized
winget is provided by App Installer from the Microsoft Store. Open the Microsoft Store, search for App Installer, update or install it, and then reopen Command Prompt. You can check whether Windows can find it with:
where wingetNo package found matching input criteria
The package source may be unavailable or the package ID may have been entered incorrectly. Search the source and use the exact ID:
winget search Git.Git --source wingetIf the search still fails, refresh the source:
winget source reset --force
winget source update
Then retry the install command.
git, gh, or code is not recognized after installation
The installer usually updates PATH, but already-open terminals do not automatically reload it. Close every Command Prompt or PowerShell window, open a new one, and run the version command again.
If code is still unavailable, reinstall VS Code and make sure the installer option to add code to PATH is enabled. You can also launch VS Code from its Start menu shortcut while troubleshooting.
Installer requires administrator approval
Accept the Windows permission prompt, or open Command Prompt as Administrator and run the command again. On a managed work or school computer, an administrator may have disabled app installation; contact the device administrator in that case.
Installation fails because another installer is running
Wait for Windows Update or another setup program to finish, then retry. If the package is partially installed, check its status first:
winget list --id Git.GitExtra: Sign in to GitHub
You do not need to sign in just to install the tools. When you are ready to use GitHub CLI with your account, run:
gh auth loginChoose GitHub.com, your preferred protocol, and the browser-based login option. The CLI will open a browser and give you a one-time code to confirm.